Reverse-Sear Steak: A Thermometer-First Method
- Low oven first, serious skillet second
- Choose a genuinely thick steak
- Salt early or immediately before cooking
- Set up the oven and two thermometers
- Bake to the pre-sear target
- Dry the surface and heat the skillet
- Sear, measure, and stop at 145°F
- Rest for at least 3 minutes
- Slice with the grain mapped
- Add aromatics after the hardest heat
- Troubleshoot the method
- Store and reheat the leftovers
Low oven first, serious skillet second
Reverse searing divides one difficult job into two manageable ones. A low oven brings a thick steak gradually toward its final temperature. A brief, hot skillet sear builds the crust. The method gives you more time to notice the center approaching its target and less time to stand over a smoking pan while the inside remains philosophically raw.
This guide uses the current USDA minimum for whole beef steaks: 145°F (62.8°C), followed by at least a 3-minute rest. Lower temperatures sometimes printed on culinary doneness charts are preferences, not the safety endpoint used here.
Choose a genuinely thick steak
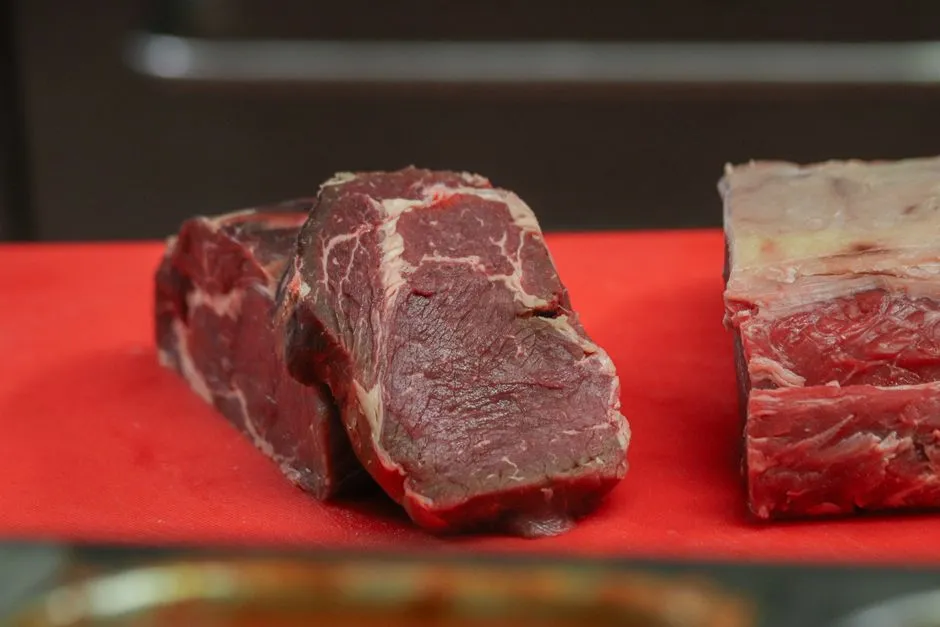
Reverse searing suits steaks about 1½ to 2 inches thick. Ribeye, strip, tenderloin, and thick top sirloin are good candidates. A steak with fairly even thickness is easier to monitor than one with a very thin tail.
For two servings, use:
- One 20- to 24-ounce steak, 1½ to 2 inches thick
- 1% fine salt by steak weight, or 6 grams for a 600-gram steak
- 1 teaspoon neutral high-smoke-point oil
- Freshly ground black pepper, optional
The 1% salt is an editorial seasoning rate, not a safety control. For a 680-gram steak, multiply 680 × 0.01 = 6.8 grams. Round only to the precision your scale can measure.
Check the label. Mechanically tenderized, injected, stuffed, or otherwise processed beef may carry specific safe-handling and cooking instructions. Follow those instructions instead of assuming a whole, intact steak method applies.
Salt early or immediately before cooking
Pat the steak dry with paper towel. Season all surfaces with the calculated salt. Set it on a wire rack over a rimmed tray and refrigerate uncovered for 4 to 24 hours. This dry-brining window lets salt distribute and the surface dry for better browning.
If you do not have that time, salt immediately before the steak enters the oven. Avoid salting it for a short middle window and then leaving drawn-out surface moisture in place without time to reabsorb; even then, blotting the surface dry before cooking can help.
Keep raw beef and its juices away from salads, sauces, clean plates, and cooked food. Wash hands and clean touched surfaces. Do not wash the steak; splashing water can spread contamination around the sink.
Set up the oven and two thermometers
Heat the oven to 250°F (121°C). If possible, verify its temperature with an oven thermometer. Put the steak on its rack and tray so warm air can reach both broad sides. Without a rack, use a parchment-lined rimmed tray and turn once.
Use an oven-safe probe thermometer if you have one, positioning the sensing tip in the thickest center away from bone and large pockets of fat. An instant-read thermometer works too; begin checking early and close the oven promptly.
The second thermometer is less glamorous: your awareness of the skillet. Use a heavy cast-iron or stainless-steel pan rated for the heat, turn on ventilation, clear combustible clutter, and keep a lid nearby. Never leave an empty heating pan unattended.
Bake to the pre-sear target
Place the steak in the 250°F oven. Begin checking after 25 minutes. A 1½- to 2-inch steak often needs 30 to 50 minutes to reach 125°F to 130°F (51.7°C to 54.4°C), but thickness, bone, shape, starting temperature, and oven accuracy can move it outside that range.
The 125°F-to-130°F reading is only the transfer point, not the safe final endpoint. The steak will continue cooking during the hot sear. If it reaches 145°F in the oven, it is already safe after the required rest; sear only as briefly as needed for colour.
Check in more than one location if the steak is irregular. Slide the probe into the thickest edible center, avoiding bone, gristle, and large fat seams. A thermometer placed in fat can report a different story from the meat you plan to eat.
Dry the surface and heat the skillet
Remove the steak and blot any visible surface moisture. Let it remain on the clean rack while the skillet heats for 3 to 5 minutes over medium-high to high heat, according to the pan and range manufacturer's safe limits.
Add 1 teaspoon oil and swirl to create a thin film. If the oil smokes heavily, reduce the heat. Smoke is not a scoreboard. A properly hot pan and a dry steak matter more than converting the kitchen into weather.
Do not use butter for the initial sear because its milk solids can burn at this heat. If desired, add a small knob during the final lower-heat moments only after the steak has reached its required temperature.
Sear, measure, and stop at 145°F
Place the steak in the skillet away from you. Sear the first broad side for 45 to 75 seconds, turn with tongs, and sear the second for 45 to 75 seconds. Hold the fat edge against the pan for 20 to 40 seconds, then briefly touch any pale edge to the heat.
Check the center. Continue with 20- to 30-second turns until the thickest part reaches at least 145°F. The entire skillet stage typically takes 3 to 5 minutes. A cooler starting steak or gentler pan may take longer; a very conductive pan may move faster.
Use a clean platter or board for the cooked steak. Never return it to the raw tray unless that tray has been washed and sanitized. USDA notes that grill and pan browning cannot establish safety by appearance; measured center temperature does.
Rest for at least 3 minutes
Once the steak has reached 145°F, rest it on a clean board for at least 3 minutes before cutting or eating. Do not cover it tightly with foil, which traps steam and softens the crust. A loose tent is optional if the room is cold.
The safety rest is mandatory at this endpoint. A very thick steak may benefit from 5 to 10 minutes for more even juice distribution, but the exact sensory benefit varies. Do not claim a longer wait can compensate for removing the steak below the USDA minimum used in this guide.
Use the pause to finish a sauce, not to press the steak repeatedly and ask whether it feels ready. It has already answered with a number.
Slice with the grain mapped
Identify the direction of the muscle fibers, then cut across them with a sharp knife. Some steaks contain more than one muscle; separate sections at a natural seam and rotate each one as needed.
Our guide to slicing steak against the grain explains how grain and knife angle differ. Spoon chimichurri beside the slices rather than burying the crust before anyone sees it.
Add aromatics after the hardest heat
Black pepper, butter, garlic, and woody herbs can all suit steak, but the fiercest part of the sear is not equally kind to them. Coarsely ground pepper may scorch in a very hot pan; add it after searing if your equipment runs aggressively. Butter's milk solids burn faster than neutral oil, while fresh garlic can turn bitter before a thick steak finishes.
For a butter finish, first confirm the center has reached 145°F. Reduce the heat to medium-low, add 1 tablespoon butter with one lightly crushed garlic clove and a small thyme or rosemary sprig, and spoon the foaming butter over the steak for 20 to 30 seconds. Remove the pan from heat if the solids darken rapidly. This optional finish adds roughly a minute, so count it after the stated searing range when necessary.
Discard any butter or aromatics contaminated before the steak was safely cooked. Serve from the clean resting board, and add final pepper only after tasting the seasoned crust.
Troubleshoot the method
Grey band under the crust: The skillet stage lasted too long or the steak was thinner than the method suits. Start with a thicker cut, dry it better, and use a hotter brief sear within safe equipment limits.
Weak crust: Surface moisture, crowding, insufficient pan heat, or constant movement may be responsible. Dry the steak and let each side maintain full contact during its short interval.
Center overshot: Begin the oven checks sooner or transfer closer to 125°F. Your equipment's carryover is useful data; record thickness, oven time, transfer temperature, and final result.
Outside burned: Lower the heat, use an oil suitable for high heat, and remove sugary rubs. Pepper can also scorch; add it after cooking if your pan runs extremely hot.
Steak cooked unevenly: Check actual thickness across the cut. Tie a tenderloin gently into a more even cylinder if appropriate, or remove a thin section earlier rather than forcing every part to finish together.
Store and reheat the leftovers
Refrigerate cooked steak within 2 hours, using a shallow covered container. USDA lists home-cooked beef at 3 to 4 refrigerated days. Reheat leftovers to 165°F (73.9°C).
For gentler reheating, slice only what you need and warm covered in a skillet with a spoonful of water, then verify the center. Cold steak also works in a salad when it has been stored safely; “served cold” is a serving choice, not an excuse to leave it out.
For a longer live-fire project, smoked beef short ribs use the same thermometer-first thinking at a very different scale. Steak is the swift version: low heat, fast crust, accurate center, clean board. No secret handshake required.
This recipe provides general food-preparation information. Follow current government food-safety guidance, product labels, ventilation precautions, and equipment instructions. Seek qualified advice for individual dietary or health needs.