Smoked Beef Short Ribs: A Tender, Meaty Guide
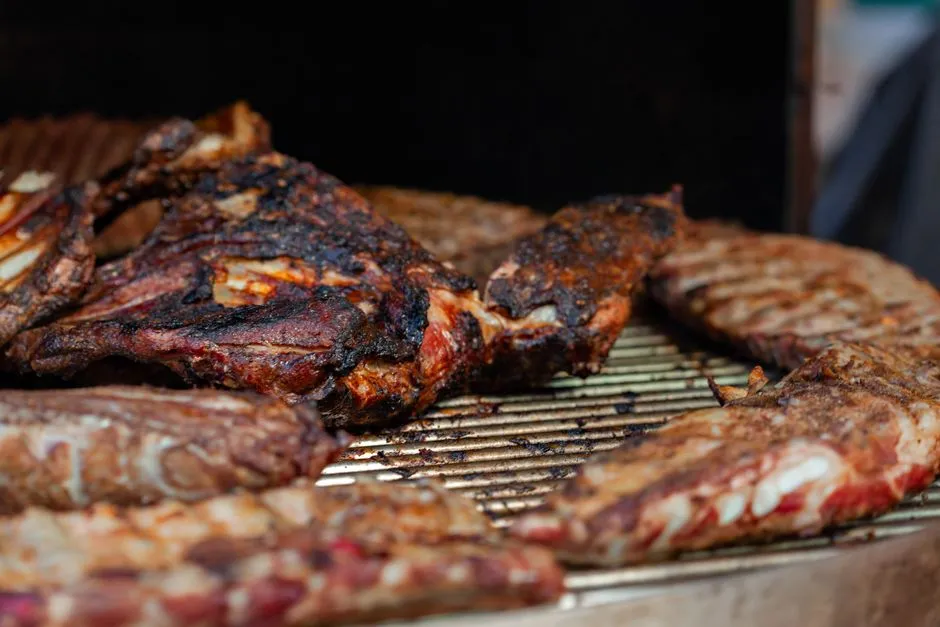
- Big ribs, two thermometers, no fixed appointment
- Recipe at a glance
- Ingredients
- Buy the cut you mean
- Trim only what needs trimming
- Season evenly
- Preheat and verify the smoker
- Smoke bone-side down
- Judge when the bark is set
- Cook until probe-tender
- Rest without losing the bark
- Slice between the bones
- Troubleshoot the cook
- Chill leftovers promptly
Big ribs, two thermometers, no fixed appointment
Plate beef short ribs are barbecue built on a generous scale: three long bones, a deep layer of meat, and enough connective tissue to make patience taste like a plan. They are often called “dino ribs,” which is inaccurate paleontology but excellent menu writing.
Cook them in a smoker held between 250°F and 275°F (121°C to 135°C), using one thermometer for the cooker and another for the meat. The ribs are safe once whole beef reaches 145°F with a 3-minute rest, but they will still be tough. Barbecue tenderness usually arrives around 200°F to 205°F (93°C to 96°C), when a probe enters the meat between bones with little resistance.
Temperature describes progress. Probe feel decides texture. The clock merely tells you how late lunch has become.
Recipe at a glance
- Yield: 4 to 6 servings
- Ribs: One 3-bone plate short-rib rack, 4 to 5 pounds (1.81 to 2.27 kilograms)
- Preparation: 20 to 25 minutes
- Smoking: About 6 to 9 hours
- Rest: 45 to 60 minutes
- Total: About 7 hours 5 minutes to 10 hours 25 minutes
- Smoker temperature: 250°F to 275°F
- Tenderness range: Commonly 200°F to 205°F, confirmed by probe feel
The minimum total recomputes as 20 minutes preparation + 6 hours cooking + 45 minutes resting = 7 hours 5 minutes. The maximum is 25 minutes + 9 hours + 60 minutes = 10 hours 25 minutes. Weather, meat thickness, bone shape, airflow, and cooker recovery can push outside even that wide range, so build schedule margin.
Ingredients
- One 4- to 5-pound 3-bone plate beef short-rib rack
- 22 grams kosher salt
- 18 grams coarse black pepper
- 6 grams granulated garlic
- 2 teaspoons neutral oil or prepared yellow mustard, optional binder
- 1 cup unsalted beef stock or water, only if wrapping
The 22 grams salt equals about 1.21% of a 4-pound rack and 0.97% of a 5-pound rack, counting bone weight. That is a practical range for this whole-rack recipe, not a curing formula. Salt brand density does not matter when you use grams.
Do not substitute curing salt. This is fresh meat cooked in one continuous hot-smoking session, not preserved charcuterie.
Buy the cut you mean
Ask for plate short ribs in a three-bone rack with a substantial meat cap. Chuck short ribs are usually smaller, and thin cross-cut flanken ribs need an entirely different fast cooking method. Confirm the cut, weight, and whether the membrane or exterior fat has been trimmed.
Fresh beef ribs may be refrigerated at 40°F (4°C) or below for 3 to 5 days, according to USDA's beef storage guidance. Follow a use-by date when provided and freeze if plans change.
Completely thaw frozen ribs in the refrigerator before smoking. USDA specifically advises thawing meat before low-temperature smoking so a frozen center does not leave the meat too long in unsafe temperatures.
Trim only what needs trimming
Unwrap the cold rack on a raw-meat board. Pat dry. On the meat side, remove dangling pieces and any very thick, hard surface fat that will not render. Leave softer fat and do not excavate between muscles.
On the bone side, the membrane can remain; it helps hold the rack together and is not normally eaten. Remove loose flaps that may burn. If the butcher has exposed the bones heavily, simply season what is present rather than trying to make the rack resemble a competition photo.
Do not wash the beef. Clean and sanitize the board, knife, sink area, and touched handles after preparation. Keep the cooked-rib platter somewhere raw juice cannot visit.
Season evenly
Combine the 22 grams salt, 18 grams pepper, and 6 grams garlic. Apply the optional 2 teaspoons oil or mustard in a very thin layer; it helps seasoning adhere but does not seal in juice.
Sprinkle the seasoning over the meat side, edges, and accessible ends. Use less on bare bone. If time permits, refrigerate the seasoned rack uncovered on a tray for 4 to 12 hours. Otherwise, let it stand only while the smoker preheats, keeping the total room-temperature period brief.
The rub contains no sugar because a long cook offers sugar many hours to darken beyond charm. Add a sweet glaze near the end only if desired.
Preheat and verify the smoker
Operate the smoker outdoors in a well-ventilated location on a stable noncombustible surface, away from structures and dry vegetation as the manufacturer and local rules require. Never use a grill or smoker indoors, in a garage, tent, or enclosed porch; carbon monoxide can accumulate.
Preheat to 250°F to 275°F. Place an independent grate-level thermometer near the food because a lid gauge may read a different zone. USDA's safe-smoking range is 225°F to 300°F throughout the process, so the chosen band sits inside it.
Use clean fuel and cooking wood approved for the smoker. Follow the manufacturer's guidance on wood quantity and ignition. Dense white smoke and bitter soot are not proof of effort; clean combustion often looks like thin, almost invisible smoke.
Smoke bone-side down
Place the rack bone-side down with the thicker end toward the hotter part of the cooker. Insert an oven-safe food probe into the thickest meat between bones, avoiding bone and large fat seams. Close the lid.
Maintain 250°F to 275°F. Avoid opening the cooker for the first 3 hours unless fuel, fire, or equipment requires attention. After that, inspect every 60 to 90 minutes. Rotate the rack if your cooker has a proven hot side.
Spritzing is optional, not mandatory hydration. If the edges look dry, mist lightly with water or unsalted stock after the bark has begun to set. Opening the lid repeatedly lengthens the cook and can disturb temperature more than the spritz helps.
Judge when the bark is set
After roughly 4 to 6 hours, the surface may be dark mahogany, dry to a gentle touch, and no longer release rub onto a fingertip. Internal temperature often sits somewhere in the 160s or 170s Fahrenheit, but bark appearance—not a prescribed number—decides wrapping time.
Leave the ribs unwrapped for the firmest bark. If the exterior is getting too dark or the schedule needs help, wrap the rack in unwaxed food-grade butcher paper. Add no liquid for firmer bark, or add up to 1 cup unsalted stock before sealing for a softer, moister environment.
Foil traps more steam and softens the crust. It works, but it changes the result. Return the wrapped ribs to the smoker bone-side down and reinsert the probe without striking bone.
Cook until probe-tender
Begin checking tenderness around 195°F (91°C). Slide an instant-read probe or thin skewer between the bones into several thick areas. The meat is ready when the tool enters with little resistance, like room-temperature butter, and the rack has commonly reached 200°F to 205°F.
Do not remove solely because the display says 203°F. One rack may become tender at 199°F; another may need 207°F. Both are well above the 145°F safety minimum, but only probe feel answers whether connective tissue has softened enough.
If the ribs remain firm, continue cooking and check every 20 to 30 minutes. If an edge is tender before the thick center, shield the edge with foil rather than ending the entire cook early.
Rest without losing the bark
Transfer the finished rack to a clean tray. If unwrapped, tent loosely with foil. If wrapped, keep it wrapped but open the package for 5 minutes first to release intense steam, then reclose.
Rest for 45 to 60 minutes in a warm, safe location. Do not hold meat for extended periods below 140°F. For a planned longer hot hold, use equipment capable of maintaining at least 140°F and monitor it with a thermometer.
Resting lets temperature settle and juices redistribute, but it is not permission to leave the rack on the counter through the afternoon. Schedule the ribs early and use a controlled hot hold if needed.
Slice between the bones
Place the rack bone-side up on a clean, stable board so you can see the gaps. Cut between bones with a long sharp knife, then turn each rib meat-side up. For smaller servings, remove the bone and slice the meat across its visible grain.
Our guide to slicing beef against the grain explains how to handle changing fiber directions. Serve chimichurri beside the rich beef for acidity and herbs.
Troubleshoot the cook
Tough at 203°F: Keep cooking. The probe feel matters more than the round number, and the center may not match the probe location.
Dry edges: The rack may be thin, the cooker too hot, or the cook too long. Shield thin areas, verify grate temperature, and wrap once the bark is set.
Bitter surface: Dirty combustion, excessive wood, or smoldering fuel can deposit harsh smoke. Improve airflow and follow the smoker's fire-management instructions.
Soft bark: Steam from foil or too much spritzing can soften it. Unwrap near the end and return to controlled heat for 10 to 20 minutes, watching the surface.
Cook finished early: Use a monitored hot hold at 140°F or above. Do not let ribs drift through unsafe temperatures while waiting for guests.
Chill leftovers promptly
Refrigerate ribs within 2 hours of removing them from the smoker. Divide a large rack into smaller portions, place them in shallow containers, cover, and refrigerate. USDA lists home-cooked beef at 3 to 4 refrigerated days. Reheat leftovers to 165°F.
Freeze tightly wrapped portions for longer storage. Label the date and thaw in the refrigerator. Smoke flavour is powerful, but it has no special authority over storage limits.
For a much faster beef project, the reverse-sear steak moves from low heat to a hot finish in under an evening. Short ribs take the long route. Two thermometers and an honest schedule make that route far more predictable.
This recipe provides general food-preparation information. Follow current government food-safety guidance, local fire restrictions, and smoker instructions. Use outdoor cookers only outdoors in suitable ventilated locations. Seek qualified advice for individual dietary or health needs.